Amigurumi for Beginners: Crochet Your First Animal
Amigurumi (say it "ah-mee-goo-roo-mee") is the Japanese craft of crocheting small stuffed toys, and it is one of the most addictive corners of the whole…

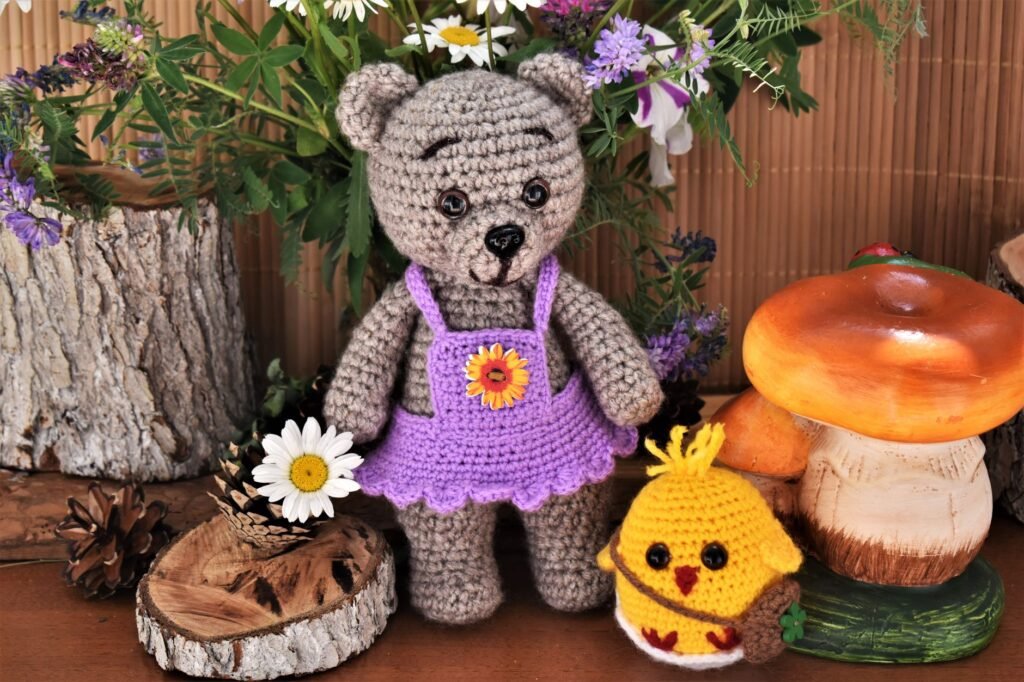
Amigurumi (say it “ah-mee-goo-roo-mee”) is the Japanese craft of crocheting small stuffed toys, and it is one of the most addictive corners of the whole hobby. One little ball of yarn turns into a bear, a bunny, an avocado with a face – genuinely almost anything you can imagine. The good news for you as a beginner is that amigurumi does not require fancy stitches. It is built almost entirely on one stitch, worked in a spiral, shaped with two simple tricks. Once those click, you can make basically any creature you want. Let’s walk through the fundamentals first, then put them to work on a real, tiny pattern.
Jump to section
- What Amigurumi Actually Is
- Tools You Will Want
- The Stitch Marker Is Not Optional
- Starting With a Magic Ring
- Increasing: How Amigurumi Grows Outward
- Decreasing: How Amigurumi Shapes Back In
- Stuffing Your Piece
- Closing Up: The Cinch
- Eyes: Safety Eyes or Embroidered
- Starter Pattern: A Simple Amigurumi Ball
- A Few Encouraging Tips
- Frequently asked questions
What Amigurumi Actually Is
At its core, amigurumi is single crochet (sc) worked in continuous, joinless rounds – a spiral, not a series of separate closed circles. Instead of slip stitching to close each round the way many hat or blanket patterns do, you just keep spiraling upward, round after round, which is what gives amigurumi its smooth, seamless surface with no bumpy joins running down the side. That tight, dense fabric is also exactly what holds stuffing in and keeps your toy’s shape crisp instead of lumpy.
Tools You Will Want

You do not need much to start: worsted weight or sport weight yarn (smooth, plain colors are easiest to see your stitches in while you are learning), polyester fiberfill stuffing, a yarn needle, small scissors, and a stitch marker. The one tool choice that trips beginners up is the hook. For amigurumi, you want to go down a size from what the yarn label recommends – for worsted weight yarn (label weight #4), that usually means a 3.5mm to 4.0mm hook instead of the 5.0mm or 5.5mm suggested for garments. A smaller hook makes your stitches tighter and closer together, which matters a lot here: loose amigurumi stitches let the white stuffing peek through, and nobody wants their cute bear to look like it has a skin condition.
The Stitch Marker Is Not Optional
Because amigurumi rounds spiral instead of closing, there is no natural “end” to a round – it just flows into the next one. Without a marker, it is very easy to lose track of where round 5 stopped and round 6 started, which makes following a pattern nearly impossible. Drop a stitch marker (a scrap of contrasting yarn works fine) into the first stitch of each round, and move it up into the first stitch of the new round every time you complete one. This one habit will save you more frustration than almost anything else on this list.
Starting With a Magic Ring
Nearly every amigurumi piece begins with a magic ring (MR), an adjustable loop of yarn that lets you work your first round of stitches into it and then cinch the center closed completely, with no hole left behind – unlike starting with a chain, which almost always leaves a small gap at the very top. To make one, loop your yarn into a ring, hold the crossing point between your fingers, and work your first round of single crochet stitches around both strands of that loop. Once the round is complete, pull the short tail firmly to close the ring into a tight little circle before you continue.
Increasing: How Amigurumi Grows Outward
An increase (inc) is simply working 2 sc into the same stitch instead of 1. Each increase adds one extra stitch to your round, which is how a tiny 6-stitch circle grows into a wider circle for a head, body, or foot. Increases are almost always spread evenly around a round rather than clustered together, which is what keeps your growing piece lying flat and round instead of curling or puckering to one side.
Decreasing: How Amigurumi Shapes Back In
A decrease (dec) does the opposite job – it removes a stitch so your piece narrows, which is what closes the top of a head or pulls a body in toward a neck. The best decrease for amigurumi is the invisible decrease: insert your hook into the front loop only of the next stitch, then the front loop only of the following stitch, so you have 3 loops on your hook, yarn over, and pull through all 3 loops to complete it as one single crochet. Because you are only picking up the front loops, this method avoids the small gap or bump that a regular decrease can leave, keeping your shaping smooth and nearly invisible from the outside – which is exactly where the technique gets its name.
Stuffing Your Piece
Stuff as you go, a little at a time, rather than waiting until the whole piece is finished and trying to cram fiberfill in through a tiny closing hole. Use small pinches and push them in with the blunt end of your yarn needle or a chopstick, firmly enough that the piece feels solid and holds its shape when you press it, but not so tightly that the stitches stretch apart and gape. Firm, even stuffing is what gives a finished amigurumi that satisfying, huggable density instead of a floppy or lumpy feel.
Closing Up: The Cinch
When you reach the final round of a piece, cut your yarn leaving a long tail (about 8 in / 20 cm), and thread it onto your yarn needle. Weave the needle through the front loop of each remaining stitch around the opening, then pull the tail gently but firmly to draw all those stitches closed like a drawstring bag. Pop the needle through to the inside of the piece to bury the end, then weave it in among the stuffing and trim.
Eyes: Safety Eyes or Embroidered
You have two solid options for amigurumi faces. Plastic safety eyes snap together with a locking washer on the inside and give toys that classic, polished amigurumi look, but they are considered a choking hazard and are not appropriate for anything meant for children under three. Embroidered eyes, stitched on with dark yarn or embroidery floss, are softer looking and completely safe for babies and toddlers. When in doubt about who the toy is for, embroider.
Starter Pattern: A Simple Amigurumi Ball
This little ball is the true building block of amigurumi – round it out into a head, shrink it down for a paw, or stack two together for a snowman-style body. Work it in worsted weight yarn with a 3.5mm-4.0mm hook, in a continuous spiral, using your stitch marker every round.
- Rnd 1: MR, 6 sc into the ring. (6 sts)
- Rnd 2: Inc in each st around. (12 sts)
- Rnd 3: *Sc 1, inc* repeat around. (18 sts)
- Rnd 4: *Sc 2, inc* repeat around. (24 sts)
- Rnds 5-8: Sc in each st around, no increases (work 4 rounds even). (24 sts)
- Rnd 9: *Sc 2, dec* repeat around. (18 sts)
- Rnd 10: *Sc 1, dec* repeat around. (12 sts)
- Stuff firmly now, before the opening gets too small to fit stuffing through comfortably.
- Rnd 11: Dec in each st around. (6 sts)
- Fasten off, leaving a long tail, and cinch the last 6 stitches closed as described above. Weave in the end.
That is it – a firm, round little ball with no visible holes and no gaps at the top or bottom. From here, this exact shape becomes a head once you add ears, eyes, and a face; make a second, smaller version of it for a body and stitch the two together; or crochet several tiny ones for paws and a tail. Every amigurumi animal you will ever make, no matter how detailed it looks, is built from rounds just like these.
A Few Encouraging Tips
Your first ball will probably look a little wonky, and that is completely fine. Tension evens out with practice, and small imperfections disappear once a piece is stuffed and has a face on it.
If your stitch count is off, stop and recount from the start of the round rather than guessing – amigurumi shaping depends on exact numbers, so a missed increase or decrease compounds quickly.
Save your yarn tails. A few inches of leftover yarn are perfect for embroidering a nose or mouth once your piece is stuffed and closed.
You now have every tool you need – the ring, the spiral, the increase, the decrease, and the cinch – to turn a ball of yarn into something with a face and a personality. Pick a color, sit down for twenty quiet minutes, and start your very first round. Your first amigurumi animal is closer than you think.
Frequently asked questions
What stitch is used in amigurumi?
Amigurumi is built almost entirely on single crochet (sc), worked in continuous, joinless spiral rounds rather than closed circles – that spiral is what gives it a smooth, seamless surface and a tight fabric that holds stuffing in.
What hook size should I use for amigurumi?
Go down a size from what the yarn label recommends. For worsted weight yarn (label weight #4), that usually means a 3.5mm to 4.0mm hook instead of the 5.0mm or 5.5mm suggested for garments, since a smaller hook keeps stitches tight enough to hide the stuffing.
Are plastic safety eyes safe for a baby’s toy?
No – plastic safety eyes are considered a choking hazard and are not appropriate for anything meant for children under three. Embroidered eyes, stitched on with dark yarn or embroidery floss, are completely safe for babies and toddlers instead.
How do I close up the last round of an amigurumi piece?
Cut your yarn leaving a long tail (about 8 in / 20 cm), weave the needle through the front loop of each remaining stitch around the opening, then pull the tail firmly to draw the stitches closed like a drawstring bag before burying the end inside the piece.
— NoraEvery pattern hand-tested