Easy Crochet Plant Hanger Pattern for Beginners
There is something so satisfying about a plant hanger you made yourself - it turns one sunny corner into the coziest, most boho spot in the room, and it…

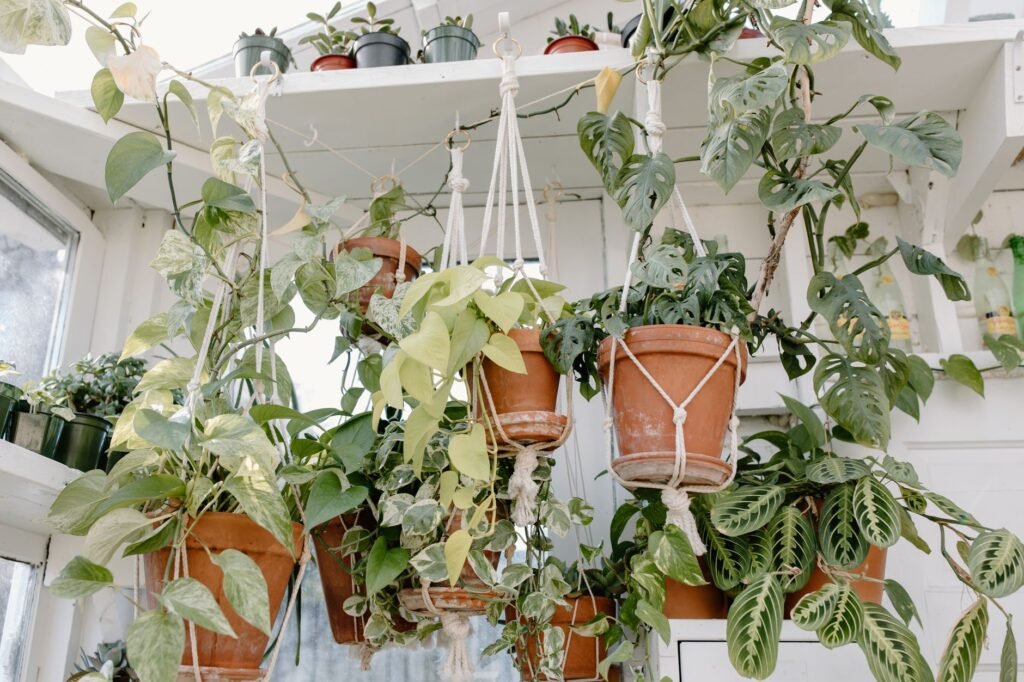
There is something so satisfying about a plant hanger you made yourself – it turns one sunny corner into the coziest, most boho spot in the room, and it costs almost nothing but a bit of yarn and an evening. Better still, the whole thing is built from just chains and a handful of simple joins, so if you can chain and slip stitch, you can make this. No macrame cording, no complicated knotting book required – just your hook, doing what it already knows how to do. The diamond shapes that give this style its signature boho look come purely from where and how often you join the strands together, which means once you understand the basic idea, you can make the net looser or tighter, shorter or longer, just by changing your measurements. Let’s hang a plant.
Jump to section
Materials
- Cotton yarn (worsted #4 weight) or a sturdy macrame-style cotton cord
- about 150 to 200 yards
- 5.0mm (H-8) crochet hook
- Yarn needle
- Scissors
- Tape measure
- A small to medium pot, about 4 to 6 inches across, to check your fit as you go
A Note on Yarn and Color

Cotton is the traditional choice for a piece like this because it has very little stretch, which means the hanger will not gradually sag out of shape under the weight of a full pot the way a springier acrylic yarn might over time. A plain cotton cord (sold labeled as macrame cord or cotton rope in many craft stores) works just as well as cotton yarn and gives an even more textured, on-trend look. Either way, a natural cream, ecru, or sand color is the classic boho choice, though there is nothing stopping you from working this same pattern in any color that suits your space.
Abbreviations
- ch = chain
- sl st = slip stitch
- sc = single crochet
- st(s) = stitch(es)
Step 1: The Hanging Loop
Chain 8, then join with a sl st in the first ch to form a small ring.
Round 1: work 8 sc evenly around the ring, join with a sl st to the first sc. (8 sc)
This little reinforced ring is what will sit on your ceiling hook or bracket, so it needs to be sturdy – the round of sc gives it enough body to hold the weight of the pot below.
Step 2: Four Long Hanging Chains
From this ring, you will build 4 long chains that hang straight down – think of them as the four “bones” of the hanger.
- Join yarn with a sl st into any st of the ring. Chain 60. Fasten off, leaving a short tail. This is Chain 1.
- Count over 2 sts around the ring, join with a sl st, chain 60, fasten off. This is Chain 2.
- Repeat twice more, spacing Chain 3 and Chain 4 evenly around the remaining ring sts.
You should now have 4 equal chains of 60 ch each, hanging evenly spaced around the ring.
Sizing note: 60 chains measures roughly 20 to 24 inches, which suits a small to medium pot. For a larger pot or a longer drop, add 10 to 15 ch to all 4 strands evenly before moving on – just keep all 4 the same length so the hanger sits level.
Step 3: Knotting the Diamond Net
This step turns your 4 straight chains into a net that can cradle a pot.
- Lay the chains flat and measure to the halfway point of each one. Insert your hook through the halfway-point chain of Chain 1 and the halfway-point chain of Chain 2 at the same time, yarn over, and draw through both to join them with a sl st. This is your first knot, and it pulls two neighboring strands together into a point.
- Repeat the same join between Chain 2 and Chain 3, then Chain 3 and Chain 4, then Chain 4 and Chain 1, always at the same measured point. You now have 4 knots forming a ring around the middle of the hanger, with 4 open diamond shapes between them – this is the net that will hold the pot.
- For extra support on a taller or heavier pot, measure 3 to 4 inches further down each chain and repeat all 4 joins again, so you have two full rings of knots instead of one.
Step 4: Gathering the Bottom
Let the 4 chains hang another 3 to 4 inches below your last row of knots, then gather them.
- Hold all 4 chain ends together. With a fresh length of yarn, wrap tightly around all 4 strands 4 or 5 times, about 1 inch up from the ends, then tie off firmly and weave the tail through the wrap to secure it. This is the little gathered cup that the base of the pot will rest against.
- Trim the ends just below the wrap, or leave them a bit longer and add a simple tassel: cut a few extra lengths of yarn, fold them in half over the gather point, and tie them on with one more wrap of yarn.
Finishing
Weave in any remaining ends with your yarn needle. Slip the top loop over your hook or bracket, then lower your pot down through the diamond net from the top – it should settle just above the bottom gather, held snugly by the net pressing gently against its sides. If the pot slips through too easily, add another row of knots between the ones you already have; if it feels too tight to fit through at all, remove a row or loosen your join a little.
Sizing recap: worked exactly as written, this hanger fits a small to medium pot about 4 to 6 inches across. For an 8 inch pot, lengthen the original 4 chains by 10 to 15 stitches and space the knot rows a little further apart so the net opens up more.
Tips for Beginners
Cotton holds its shape best. Because a plant hanger carries real weight, one made in cotton or a cotton-blend cord will sag far less over time than a stretchy acrylic would.
Measure before every knot, not after. It is much easier to measure all 4 chains before you join anything than to try to fix an uneven diamond after the fact.
Test-fit your pot early. Lower your actual pot through the net after Step 3, before you gather the bottom – it is the easiest moment to add or remove a row of knots.
Keep your chain tension steady. Since the whole structure is 4 plain chains, any tight or loose spots will show. Chain at a relaxed, even pace rather than rushing, and the 4 strands will hang level.
Label your chains as you make them. A small scrap of contrasting yarn tied loosely around Chain 1 (and removed later) makes it much easier to keep track of which strand is which while you are measuring and joining in Step 3, especially the first time you make this pattern.
A tape measure, a hook, and four long chains – that is really all it takes to hang a little piece of boho charm by your sunniest window. Once you have made one, the sizing adjustments here mean you can whip up a whole set in an afternoon: a small one for a trailing pothos, a bigger one for a leafy fern, and maybe one more for the friend who always asks where you got yours.
Frequently Asked Questions
Can I use regular yarn instead of cotton?
You can, but cotton or a sturdy cotton cord is recommended because it has very little stretch, so the hanger holds its shape under the weight of a pot better than a springier acrylic yarn would over time.
How do I size this hanger for a bigger pot?
Add 10 to 15 chains to all four hanging strands evenly, and space the knot rows a little further apart so the diamond net opens up enough for the larger pot to fit through.
What is the most common mistake when making this hanger?
Not measuring all four chains before joining them into knots, which can leave the diamond net uneven; measure each strand first, then join.
How much weight can this plant hanger hold?
It is designed for a small to medium pot, roughly 4 to 6 inches across; for a larger or heavier pot, add an extra row of knots partway down for more support.
— NoraEvery pattern hand-tested