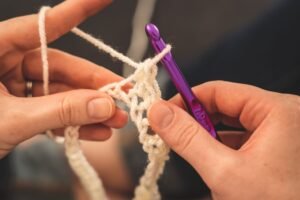
How to Crochet a Magic Ring (Magic Circle), Step by Step
If you have ever started a hat or a stuffed animal by chaining a few stitches and joining them into a ring, you already know the problem: there is almost…


If you have ever started a hat or a stuffed animal by chaining a few stitches and joining them into a ring, you already know the problem: there is almost always a little hole left in the middle, right where you least want one. The fix that most experienced crocheters swear by is called a magic ring, sometimes called a magic circle or an adjustable ring. It looks like a small trick, but once you get the hand motion down, you will use it for the rest of your crochet life. Let’s slow it down and walk through it together, one step at a time.
Jump to section
- What Is a Magic Ring, and Why Bother With It?
- When You Will Actually Use a Magic Ring
- How to Make a Magic Ring, Step by Step
- Working Your First Round Into the Ring
- Cinching the Center Closed
- Joining or Continuing in a Spiral
- Making Sure It Does Not Come Undone
- A No-Magic-Ring Alternative
- You Have Got This
- Frequently asked questions
What Is a Magic Ring, and Why Bother With It?
A magic ring is a starting loop you make with your yarn before you work your first round of stitches. Instead of chaining stitches and slip stitching them into a circle (a “chain ring”), you form an adjustable loop, work your stitches over it, and then pull the tail to cinch the center shut. That last part is the magic: because the ring is adjustable, you can pull it closed until there is no hole left at all.
Compare that to a chain ring, where the size of the center hole is fixed the moment you join your chain. No matter how hard you tug afterward, that hole stays put. For a granny square, a small gap in the center might not bother you. For amigurumi (crocheted stuffed toys) or for the crown of a hat, a gap means stuffing peeking through or a floppy, uneven point. That is why the magic ring shows up so often in patterns worked in the round.
A few quick abbreviations you will see below, since patterns lean on shorthand: ch (chain), sc (single crochet), st (stitch), and yo (yarn over, wrapping the yarn around your hook). We will only need a couple of these today, but they are worth learning now since you will see them constantly.
When You Will Actually Use a Magic Ring

You will reach for a magic ring any time a pattern is worked in the round and starts from a tiny center circle. That includes:
- Amigurumi – the heads, bodies, and limbs of most crocheted stuffed animals start with a magic ring.
- Hats – working from the crown down, the very top of the hat begins as a ring.
- Coasters and round motifs – anything worked in concentric rounds, like a classic granny square variation or a flat circle.
If a pattern says “start with a magic ring” or “adjustable ring,” this is exactly what it means.
How to Make a Magic Ring, Step by Step
Grab your yarn and hook and let’s build the loop together. This part is easiest with a smooth, medium-weight yarn while you are learning, since fuzzy or very thin yarn can be harder to see.
Step 1: Drape the Yarn Over Your Hand
Leaving a tail of about six inches, drape the working yarn (the strand attached to your ball or skein) over the back of your hand, with the tail hanging down in front and the working yarn coming from the ball behind.
Step 2: Wrap It Around Two Fingers
Wrap the yarn around your index and middle fingers (or just your index finger, if that feels more natural) so it makes one full loop. You should now have a loop of yarn sitting on your fingers, with the tail and the working yarn both hanging down from it.
Step 3: Cross the Tail Behind the Loop
Take the tail end and cross it behind the loop, so the working yarn strand lies in front, crossing over the tail. This crossing point is what holds the loop together and is what you will pull later to cinch it shut. Slide the loop off your fingers carefully, keeping that crossed shape intact.
Step 4: Insert Your Hook and Pull Up a Loop
Insert your hook through the loop from front to back, yo (yarn over), and pull the yarn through the loop. You now have one loop on your hook, sitting inside the bigger ring of yarn.
Step 5: Chain 1 to Secure It
Yarn over again and pull through the loop on your hook to make one chain. This is important: that chain 1 does not count as a stitch. It is only there to snug the loop and anchor your working yarn before you start your first real stitch. Do not count it toward your stitch total, and do not work into it later.
Working Your First Round Into the Ring
Now comes the part that makes the magic ring so useful: instead of working into individual chain stitches, you work your first round of stitches directly into the ring itself, catching both strands of the loop (the working strand and the tail) with each stitch.
- Insert your hook through the center of the ring, under both strands.
- Yarn over and pull up a loop, then yarn over again and pull through both loops on your hook. That is one single crochet (sc) made.
- Repeat this the number of times your pattern calls for. A common amigurumi start is 6 single crochet into the ring, but always follow your specific pattern’s count.
Every stitch is sitting on the ring itself, not on separate chain stitches, which is exactly why you will be able to close the center completely in the next step.
Cinching the Center Closed
Once you have worked all the stitches your pattern calls for into the ring, find the tail end and pull it firmly. You will see the loop shrink and gather the base of your stitches tightly together, closing what would otherwise be a hole. Pull slowly and evenly rather than yanking, so the stitches gather in neatly rather than bunching to one side. Keep pulling until the center is fully closed with no gap.
Joining or Continuing in a Spiral
What you do next depends on your pattern:
- If your pattern joins each round (common for flat motifs like coasters or granny-style circles), work a slip stitch into the first stitch of the round to join it, then chain 1 (or however many your pattern specifies) before starting the next round.
- If your pattern is worked in a continuous spiral (very common for amigurumi), you simply keep stitching around and around without joining, usually marking the first stitch of each round with a stitch marker so you can track where each round begins.
Your pattern will always tell you which method it wants, so check before you assume.
Making Sure It Does Not Come Undone
A magic ring is secure once it is cinched and you have worked a stitch or two locking it in place, but the tail still needs to be dealt with properly:
- Weave the tail in securely once your piece is finished, running it through several stitches in different directions rather than just one straight line, so it cannot work its way loose.
- Give it an extra tug before weaving in, just to confirm the center is fully closed and snug.
- If you are working with a slippery yarn or a piece that will get a lot of handling (like a toy), some crocheters like to tie the tail and working yarn in a small overhand knot right at the base before weaving in, as extra insurance. It is optional, but it never hurts on amigurumi that will be hugged and washed repeatedly.
A No-Magic-Ring Alternative
If the magic ring is fighting you today, that is completely normal. It takes most people a few tries to get the hand motion smooth, and there is a reliable backup so you can keep moving on your project while you practice:
Option A: Chain 2, then work all your first-round stitches into the 2nd chain from the hook (not the 1st). This leaves a very small, tidy hole, but it is far easier to control than a magic ring while you are learning.
Option B: Chain 4 and join with a slip stitch into the first chain to form a small ring, then work your first-round stitches into the center of that ring. This is the traditional “chain ring” method and gives a slightly bigger, fixed hole, but it is dependable and pattern-safe.
Either alternative will get your project moving. You can always circle back and practice the magic ring on a scrap of yarn once your project is off the hook and you are not under pressure to get a specific round finished.
You Have Got This
The magic ring is one of those techniques that feels fiddly the first few times and then suddenly clicks, usually somewhere around your fifth or sixth try. Practice it on a spare bit of yarn a few times before you commit to your actual project, and do not be surprised if your first couple of rings look a little loose or lopsided. That is completely part of learning it. Once it clicks, you will have a neat, gap-free center every single time, and that small habit alone will make your hats, amigurumi, and motifs look noticeably more polished.
Frequently asked questions
What is the difference between a magic ring and a chain ring?
A magic ring uses an adjustable loop that you cinch closed with the tail after stitching, so the center hole can close completely. A chain ring is joined with a slip stitch and its center hole size is fixed the moment you join it, no matter how hard you tug afterward.
How many stitches should I work into the magic ring?
It depends on your pattern. A common amigurumi start is 6 single crochet into the ring, but you should always follow your specific pattern’s stitch count.
What if I can’t get the magic ring to work?
You can use one of two reliable alternatives: chain 2 and work your first-round stitches into the 2nd chain from the hook, or chain 4 and join with a slip stitch to form a small ring, then work your stitches into the center of that ring.
Do I need to join each round when working from a magic ring?
It depends on your pattern. If your pattern joins each round, you work a slip stitch into the first stitch and chain before continuing. If your pattern is worked in a continuous spiral, you keep stitching around without joining, usually marking the first stitch of each round with a stitch marker.
— NoraEvery pattern hand-tested